Why Windproof Rope Clamps Are a Game-Changer for Campers
When unpredictable weather strikes, your tent’s stability depends on how well its guylines stay anchored. A high-quality outdoor tent windproof rope clamp is the unsung hero of stormproof camping—preventing slack, reducing wear on ropes, and keeping your shelter rock-solid in gusty conditions.
This comprehensive guide covers everything you need to know about these essential camping tools, from how they work to choosing the best one for your adventures.
How Windproof Rope Clamps Work: The Science Behind the Grip
Unlike traditional knots (which can loosen over time), a windproof rope clamp uses:
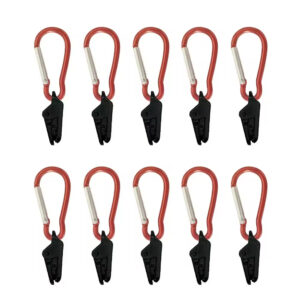
🔹 Friction-Based Locking – Serrated jaws or rubberized inserts grip the rope tightly.
🔹 Quick-Release Mechanisms – Adjust tension in seconds without untying knots.
🔹 Load Distribution – Prevents excessive strain on any single point of the rope.
Pro Tip: Look for clamps with dual-locking systems (e.g., a cam lever + teeth) for maximum wind resistance.
Top 5 Benefits of Using a Windproof Rope Clamp
-
Stormproof Security – Withstands 40+ mph winds when properly installed.
-
Faster Setup/Takedown – No more fiddling with slippery knots in the rain.
-
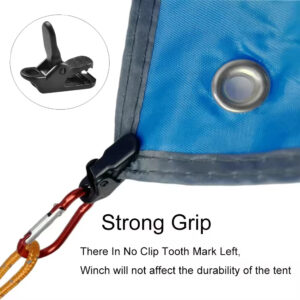
Rope Preservation – Reduces fraying caused by constant knot retying.
-
One-Handed Adjustments – Critical when you’re wearing gloves in cold weather.
-
Multi-Use Functionality – Also works for hammocks, tarps, and awning lines.
Choosing the Best Clamp: A Buyer’s Checklist
Material Matters
| Material | Best For | Weight | Durability |
|---|---|---|---|
| Aircraft Aluminum | Mountaineering | Ultra-light | Extreme |
| Nylon-Reinforced Plastic | Backpacking | Light | High |
| Stainless Steel | Base Camping | Heavy | Indestructible |
Critical Features to Compare
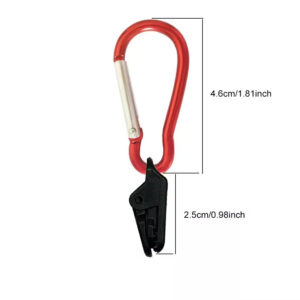
✔ Rope Compatibility (3mm–8mm thickness)
✔ UV/Water Resistance (Saltwater-safe = bonus)
✔ Fail-Safe Design (Does it have a backup locking method?)
Step-by-Step: How to Install a Rope Clamp for Maximum Wind Resistance
(Visual guide recommended – add numbered images/video to your blog post)
-
Anchor Your Guyline – Stake down one end at a 45° angle from the tent.
-
Thread Through Clamp – Leave 6–8 inches of tail beyond the clamp.
-
Pre-Tension Manually – Pull most slack out before engaging the clamp.
-
Lock & Test – Engage mechanism, then yank sharply to confirm grip.
-
Weather Check – Re-tighten after 1 hour as ropes naturally stretch.
Pro Mistake to Avoid: Over-tightening can deform ropes—leave slight flexibility for wind buffering.
The difference? The winning clamp had heat-treated teeth and a secondary silicone grip pad.